Creating Your First Flow
This guide walks you through creating your first Flow in Cognipeer. We'll build a simple but practical Flow that searches a knowledgebase and then uses a language model to generate a concise summary.
Prerequisites
Before you begin, ensure you have:
- Access to the Cognipeer platform
- Appropriate permissions to create Flows (Apps)
- At least one datasource configured in your workspace
Step 1: Navigate to the Flows Section
- Log in to your Cognipeer account
- From the dashboard, click on the Flows section in the sidebar (may be labeled Apps)
- Click Create New Flow (or Create New App) to start
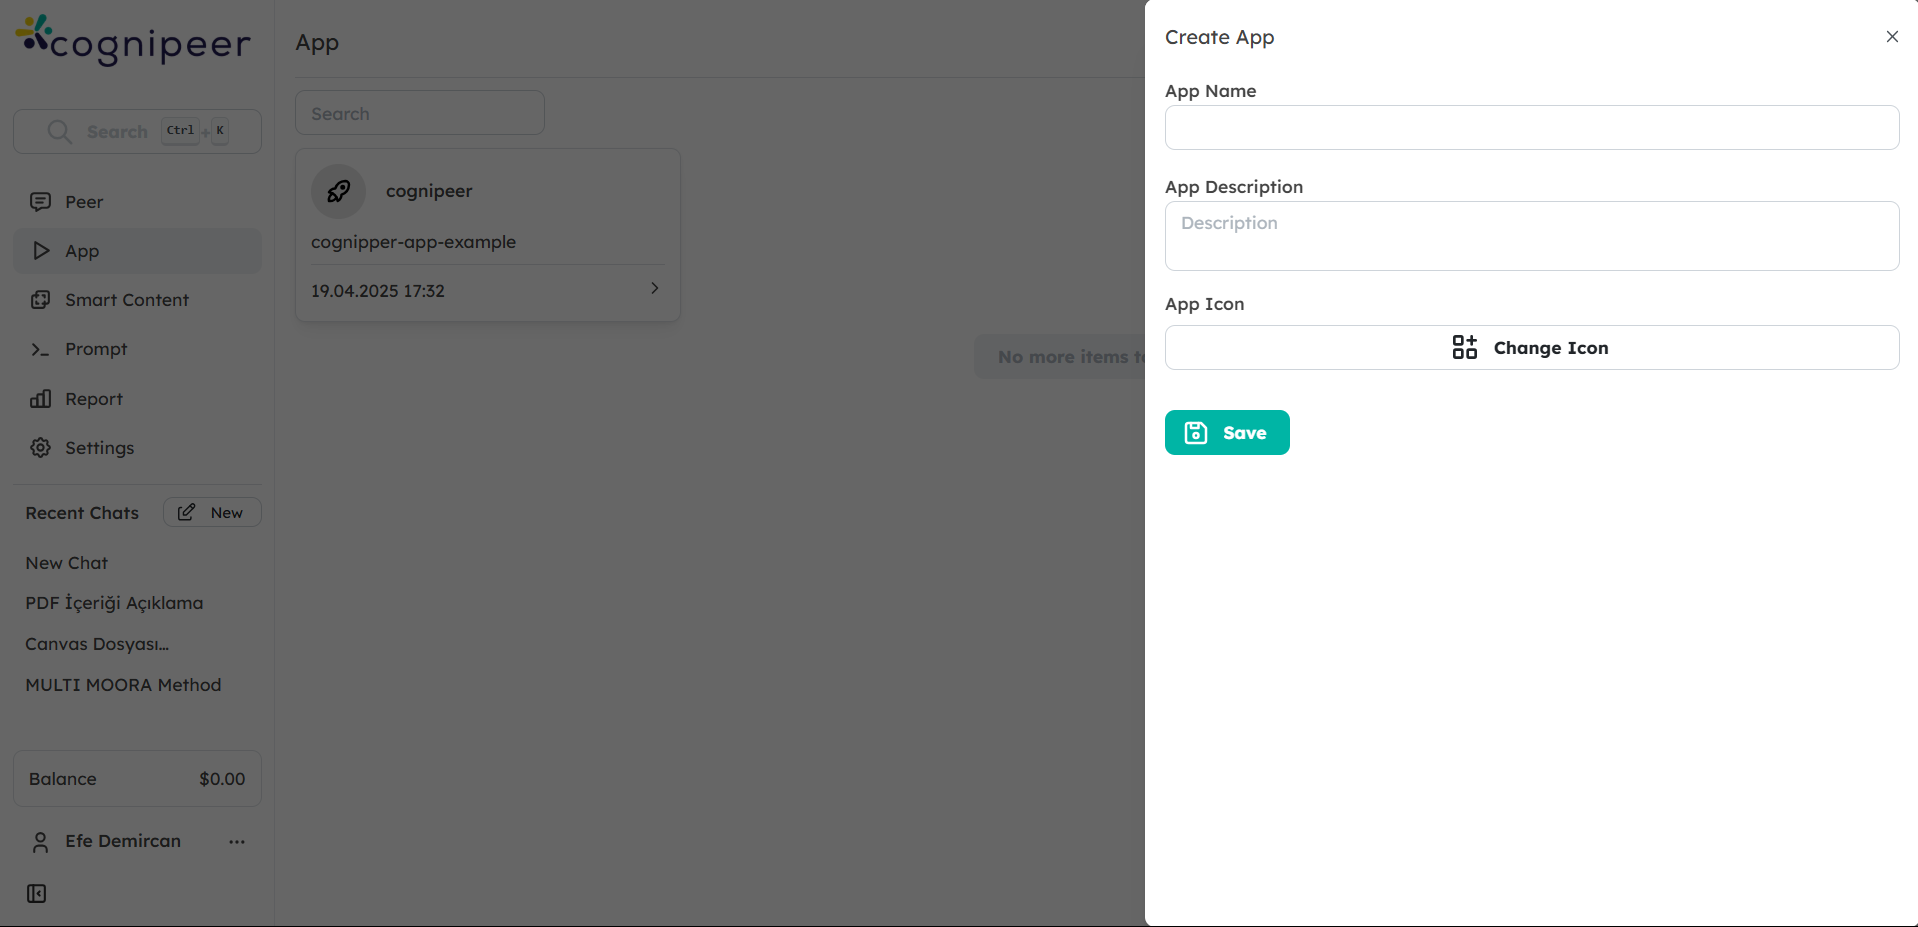
Step 2: Define Flow Details
- Enter a Name for your Flow (e.g., "Knowledge Summarizer")
- Provide a Description that explains what your Flow does
- Optionally, upload an Icon
- Click Next to proceed to the Inputs configuration
Step 3: Configure Inputs
For our Knowledge Summarizer Flow, we'll need two inputs:
Add a Text Input:
- Name:
searchQuery - Label: "Search Query"
- Description: "Enter the topic you want to search for"
- Required: Yes
- Name:
Add another Text Input:
- Name:
summaryLength - Label: "Summary Length"
- Description: "Enter 'brief', 'medium', or 'detailed'"
- Default Value: "medium"
- Required: Yes
- Name:
Click Next to proceed to the steps configuration
Step 4: Build the Steps
Now we'll add steps to create our workflow:
Add a Search Knowledgebase Step
- Click Add Step and select Search Knowledgebase
- Configure the step:
- Step Name: "Search for Information"
- Datasource IDs: Select the datasources you want to search
- Prompt: Map to the
searchQueryinput using the expression editor - All Contents: Check this box to include all content types
- Click Save Step
Add an Ask LLM Step
- Click Add Step again and select Ask LLM
- Configure the step:
- Step Name: "Generate Summary"
- Model ID: Select your preferred language model
- Prompt: Enter the following prompt, using the expression editor to insert dynamic values:
Based on the following information:

{ {steps.Search_for_Information.results} }

Please provide a { {inputs.summaryLength} } summary of the key points about { {inputs.searchQuery} }.

If the information is insufficient, please state that clearly.
- Click Save Step
Step 5: Map Outputs
Define what your Flow will return after processing:
Click Add Output and configure:
- Output Name:
summary - Output Label: "Summary"
- Output Value: Map to
steps.Generate_Summary.response
- Output Name:
Click Next to proceed to testing
Step 6: Test Your Flow
In the Test section, enter values for your inputs:
- Search Query: "artificial intelligence"
- Summary Length: "brief"
Click Run Test to execute your Flow
Review the results to ensure your Flow is working as expected
- Check that the search is finding relevant information
- Verify that the summary is generated correctly
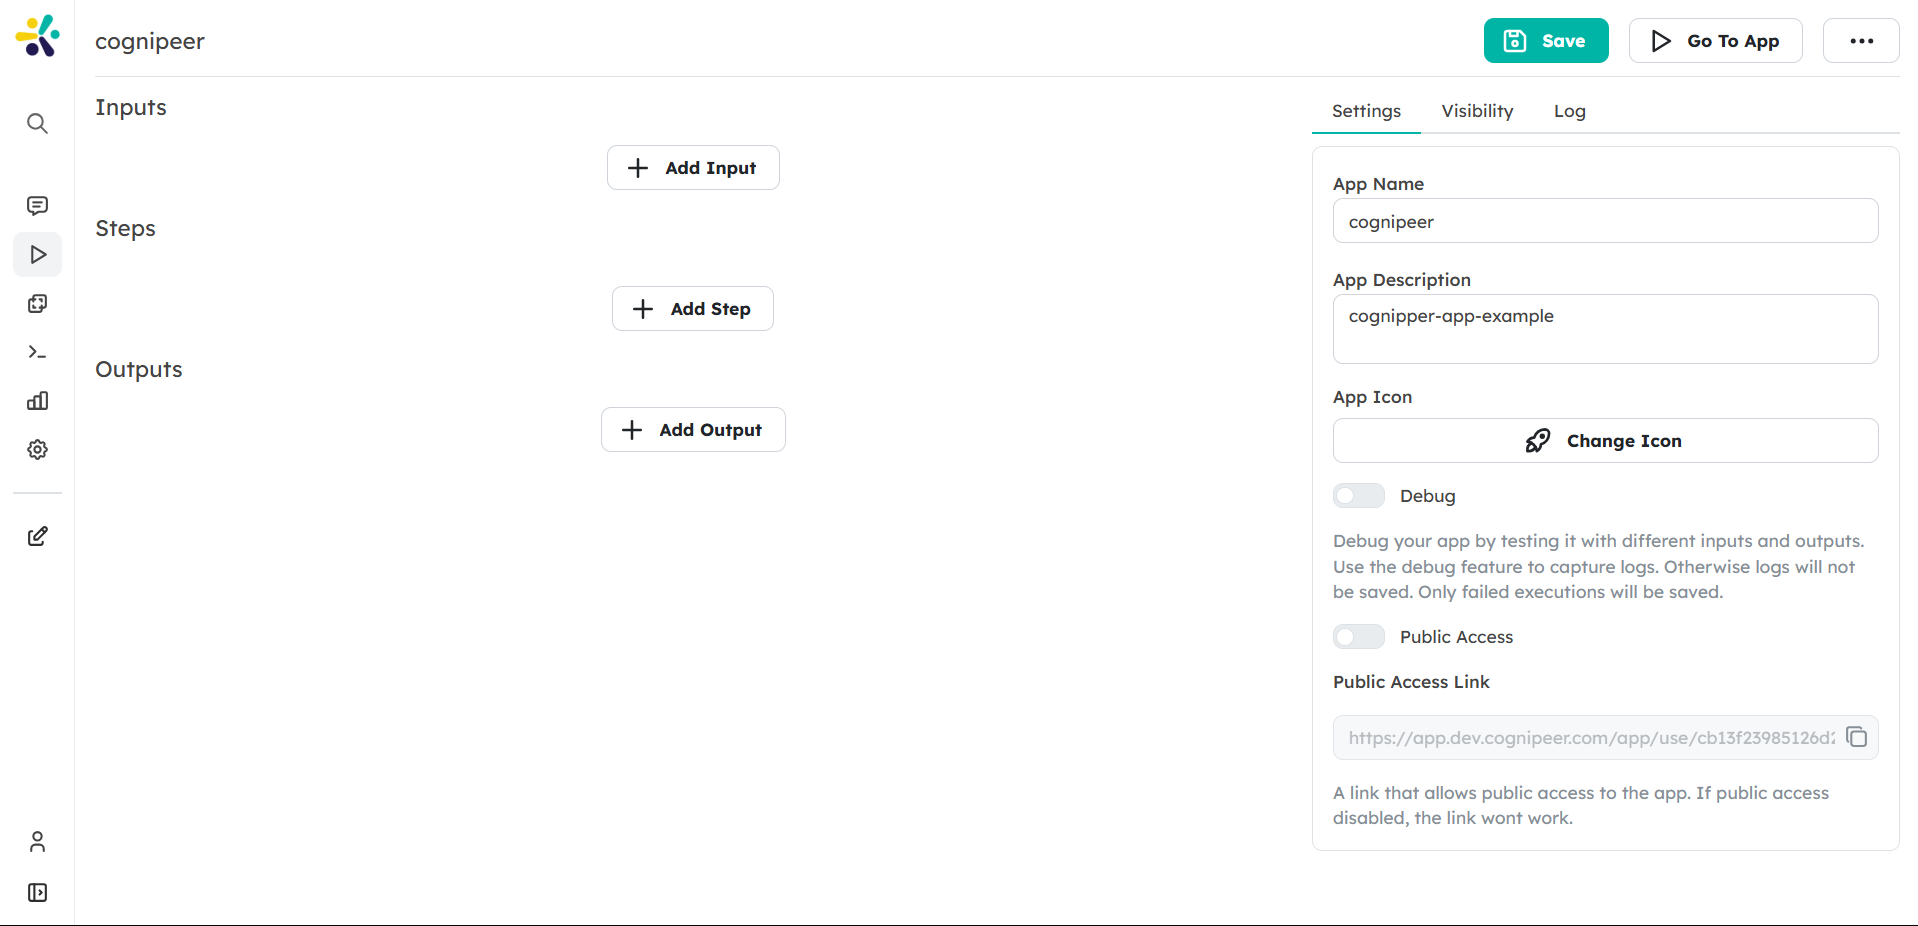
Step 7: Save and Publish Your Flow
If your test was successful, click Save Flow (or Save App)
Choose the visibility settings for your Flow:
- Private: Only you can access it
- Shared: Specific users or teams can access it
- Public: All users in your workspace can access it
Using Your Flow
Now that your Flow is created, you can:
- Run it directly from the Flows section
- Share it with colleagues who can use it with their own inputs
- Attach it to a Peer as a tool, allowing the Peer to use your Flow during conversations
- Access it via API for integration with other systems
Next Steps
Congratulations on creating your first Flow! To continue your journey:
- Explore more step types
- Learn about Flow sharing and integration
- Create more complex Flows with multiple steps and advanced data processing
By building on this foundation, you can create sophisticated Flows that automate tasks, integrate systems, and leverage AI to solve business problems.