Introduction to the Dashboard
The Cognipeer Dashboard is the central hub for managing all of your AI Peers, data sources, tools, and integrations. It provides an easy-to-navigate interface to monitor the performance of your Peers, configure settings, and analyze user interactions. This guide will introduce you to the key features of the Dashboard and show you how to maximize its functionality for your business needs.
Dashboard Overview
Upon logging into Cognipeer, you’ll land on the Dashboard. From here, you can manage all aspects of your Peers and access the tools and data sources connected to them. The Dashboard provides at-a-glance information such as Peer performance, active tools, and usage statistics.
Key Sections of the Dashboard
Peer Management
The Peers section allows you to create, customize, and manage your AI Peers. You can view performance metrics, adjust settings, and add data sources to enhance their capabilities.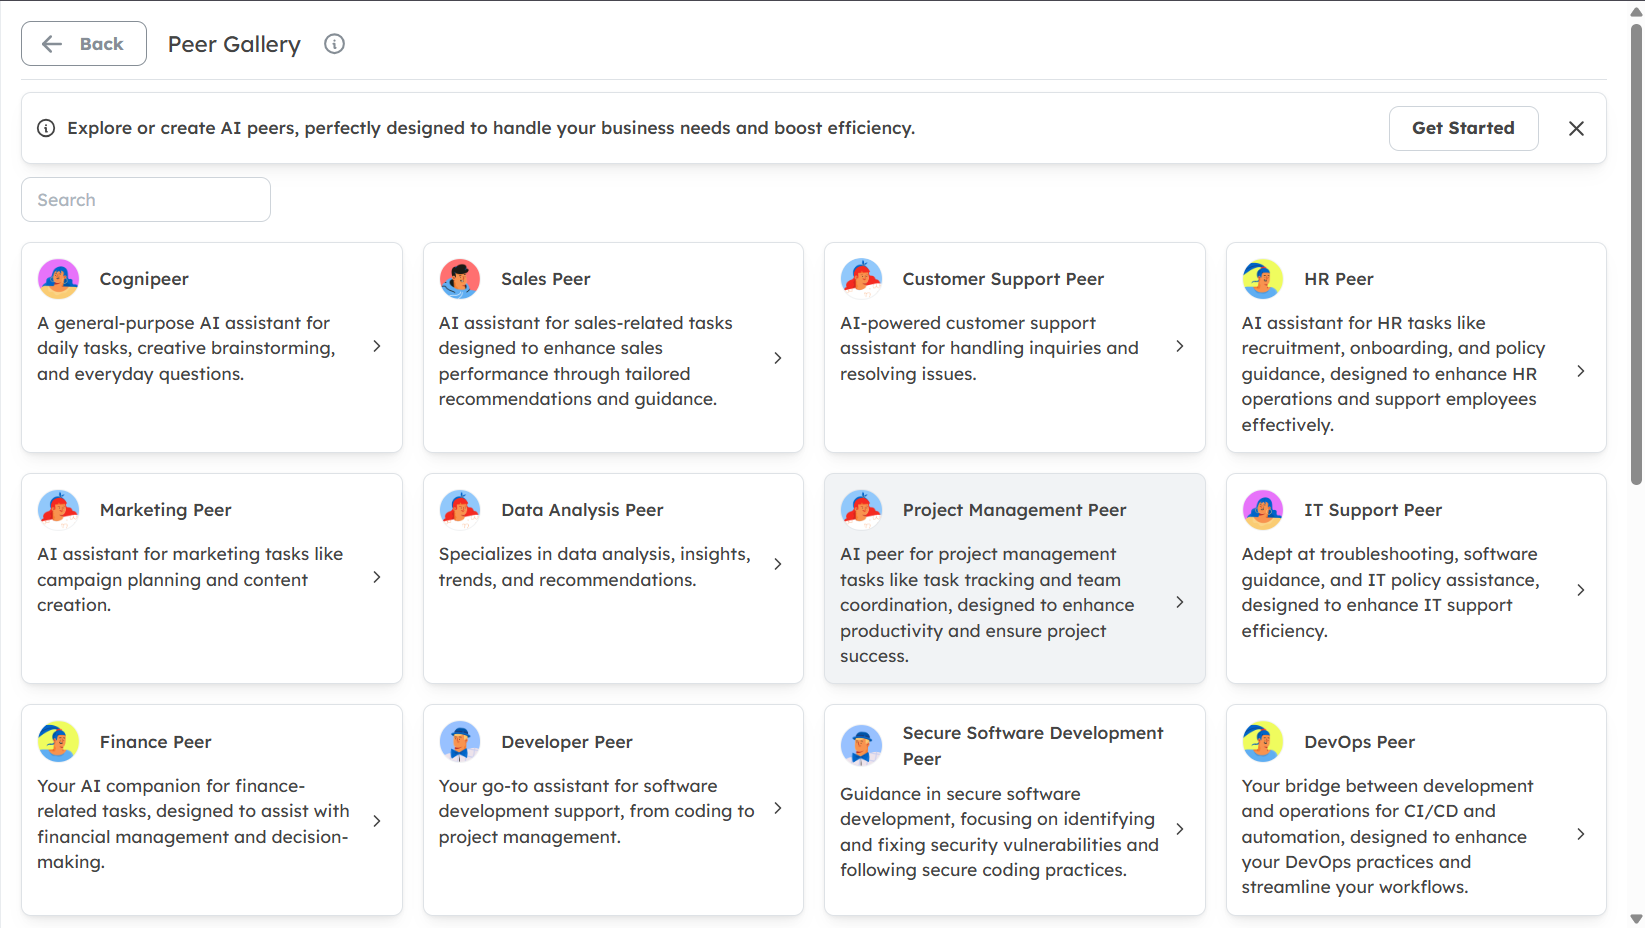
Data Sources
Manage and connect data sources to your Peers in the Data Sources section. Whether you’re linking files, websites, or custom data types, this is where you can ensure your Peers are using up-to-date and relevant information.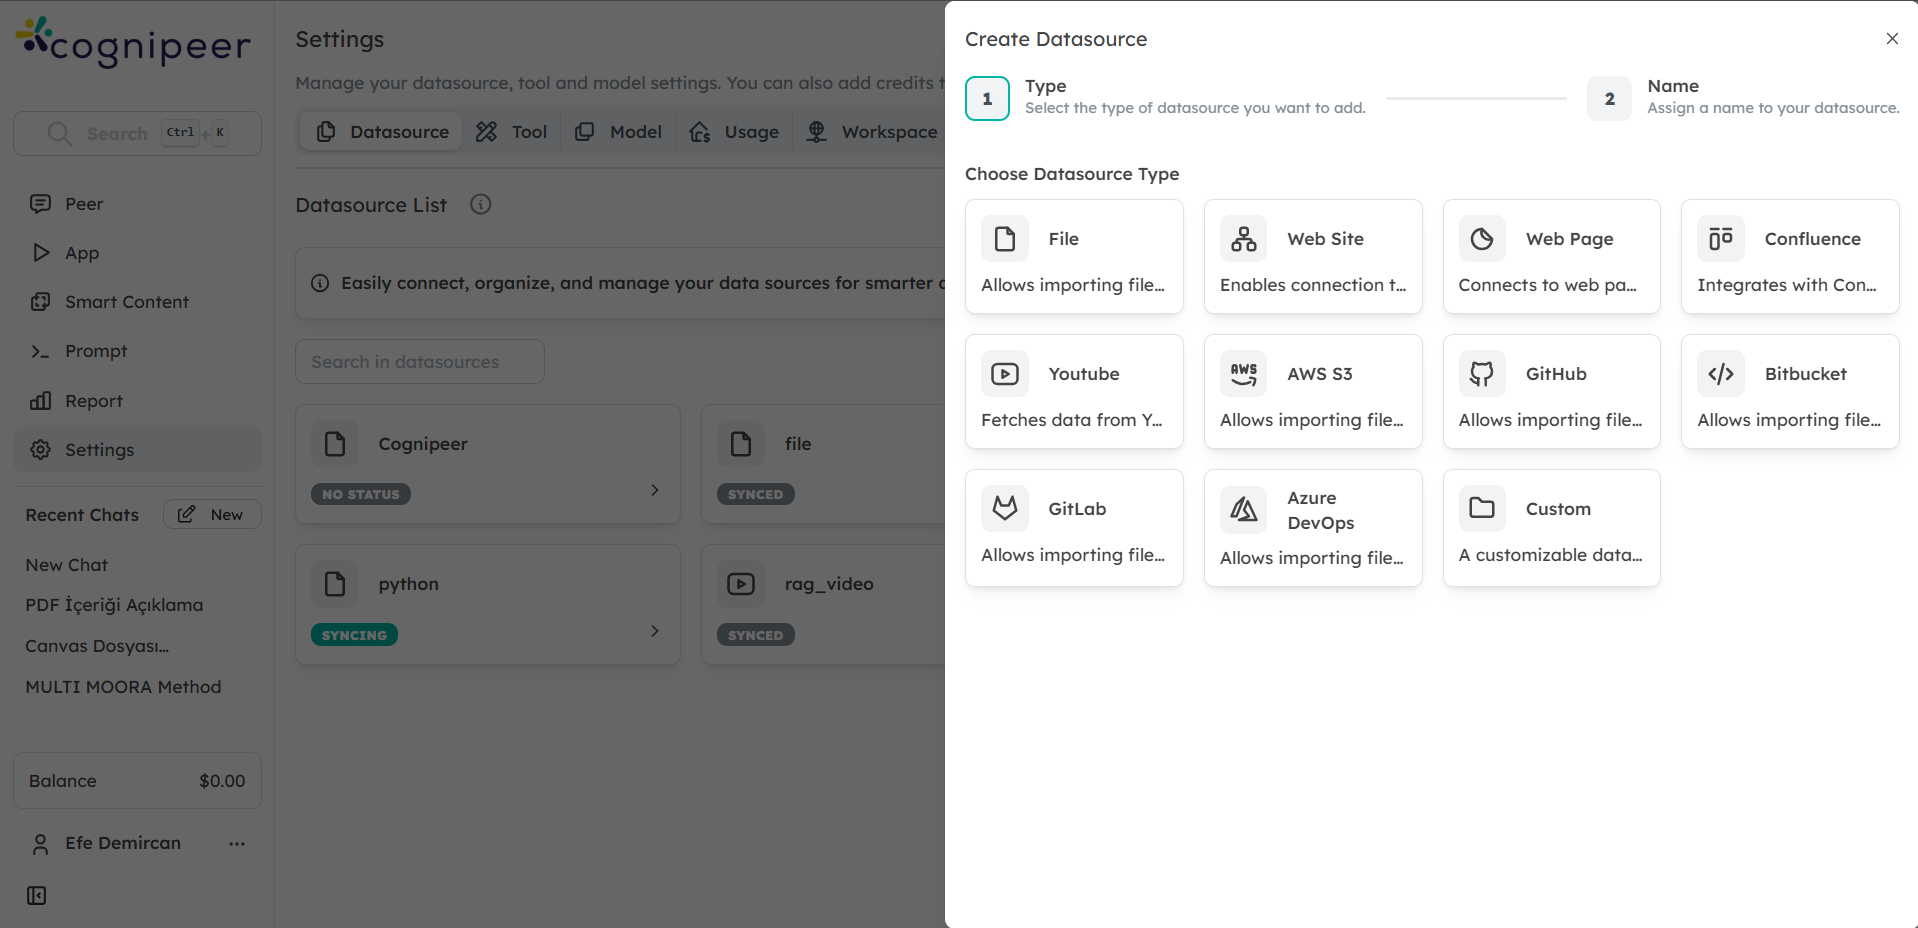
Tool Integrations
In the Tools section, you can integrate various tools with your Peers to extend their functionality. Tools like Jira, HubSpot, and more allow your Peers to interact with external systems to retrieve or create data directly.
Security Settings
The Security section allows you to manage data access and set compliance rules. Ensure that your Peers are operating within your company's data protection and privacy regulations, such as GDPR.
Performance Monitoring
The Performance section provides insights into how your Peers are performing. Track conversations, review response accuracy, and analyze metrics that will help you improve your Peers' effectiveness.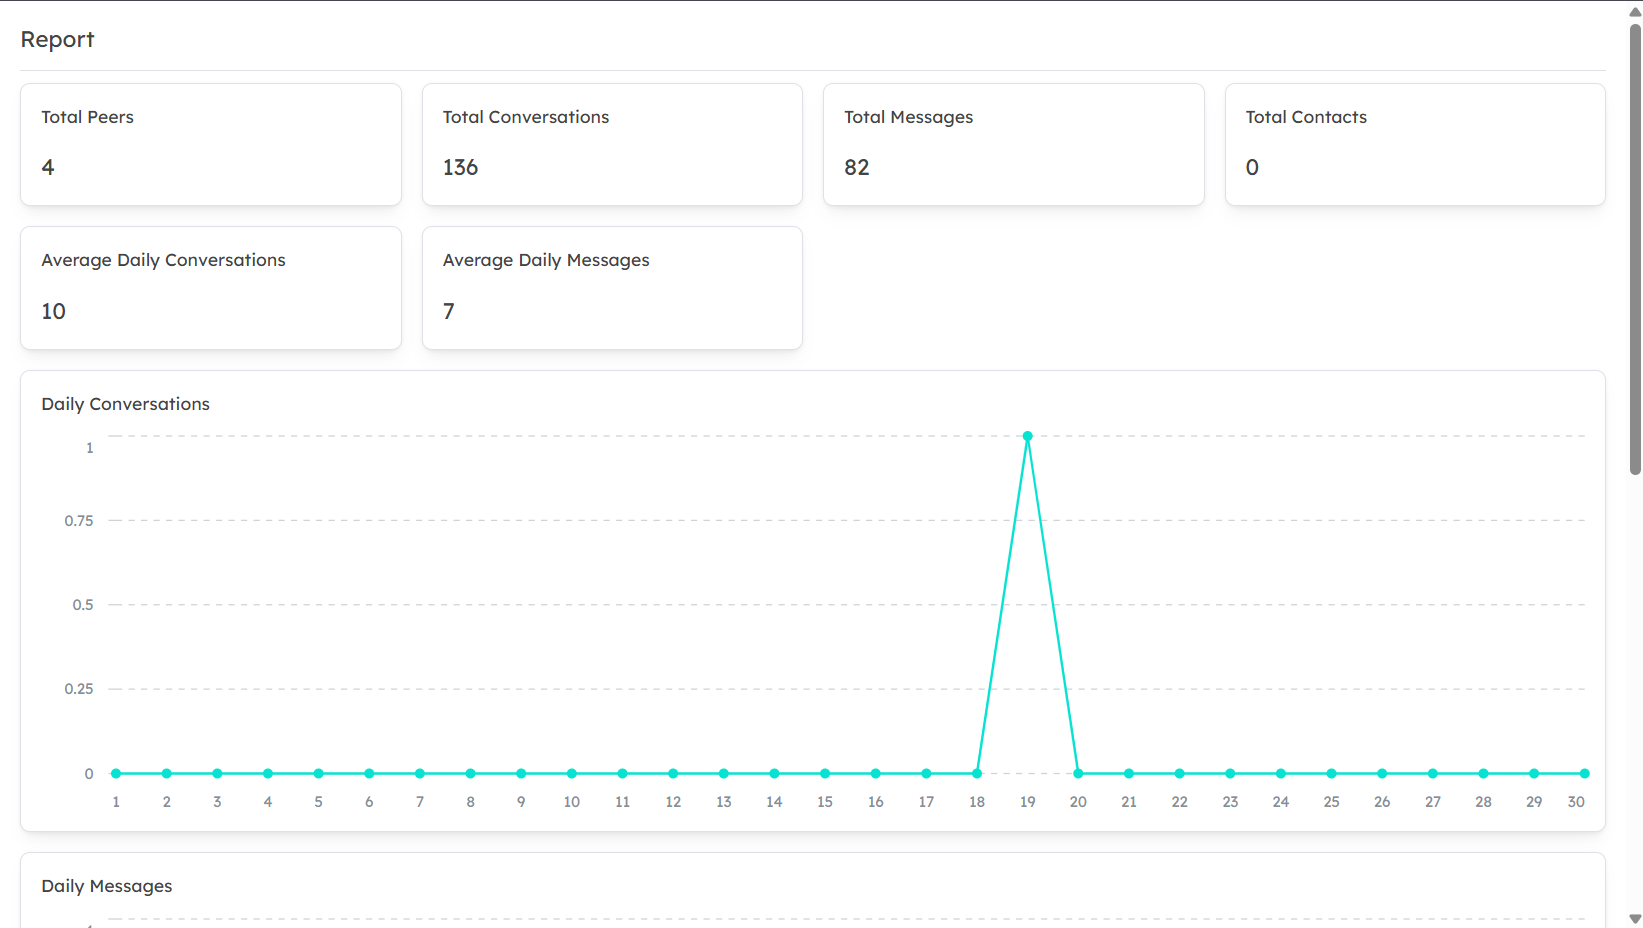
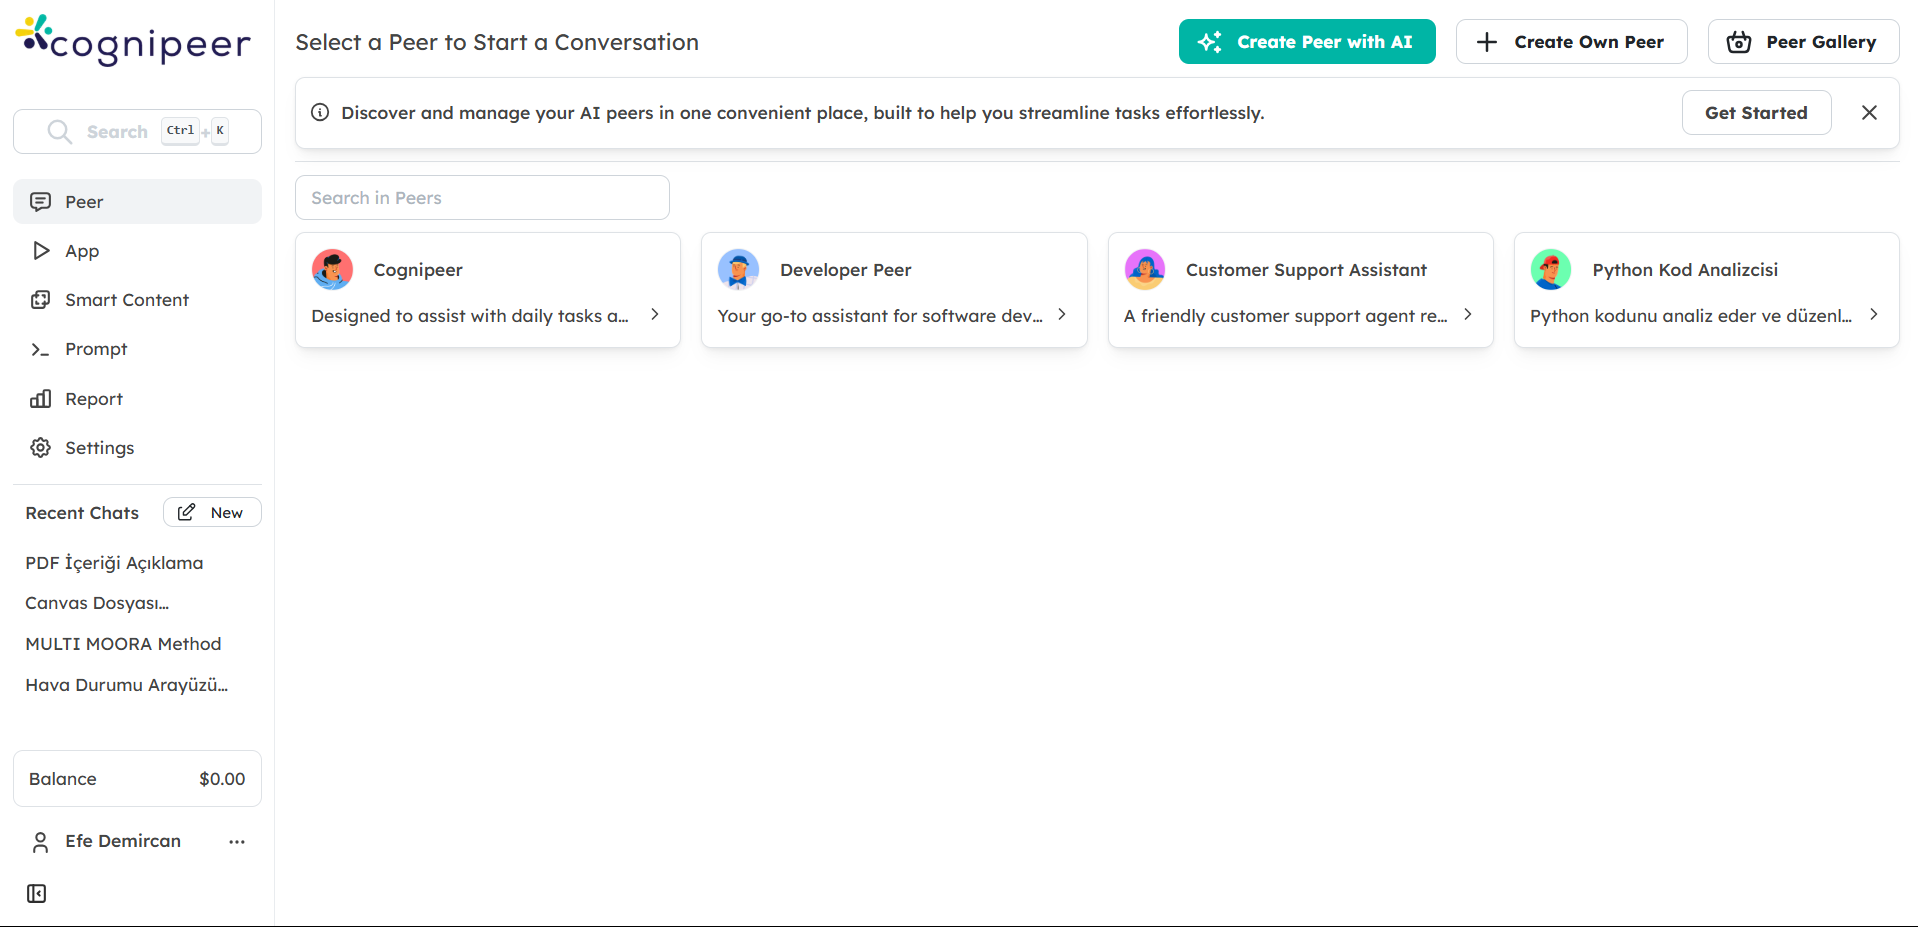
Managing Peers
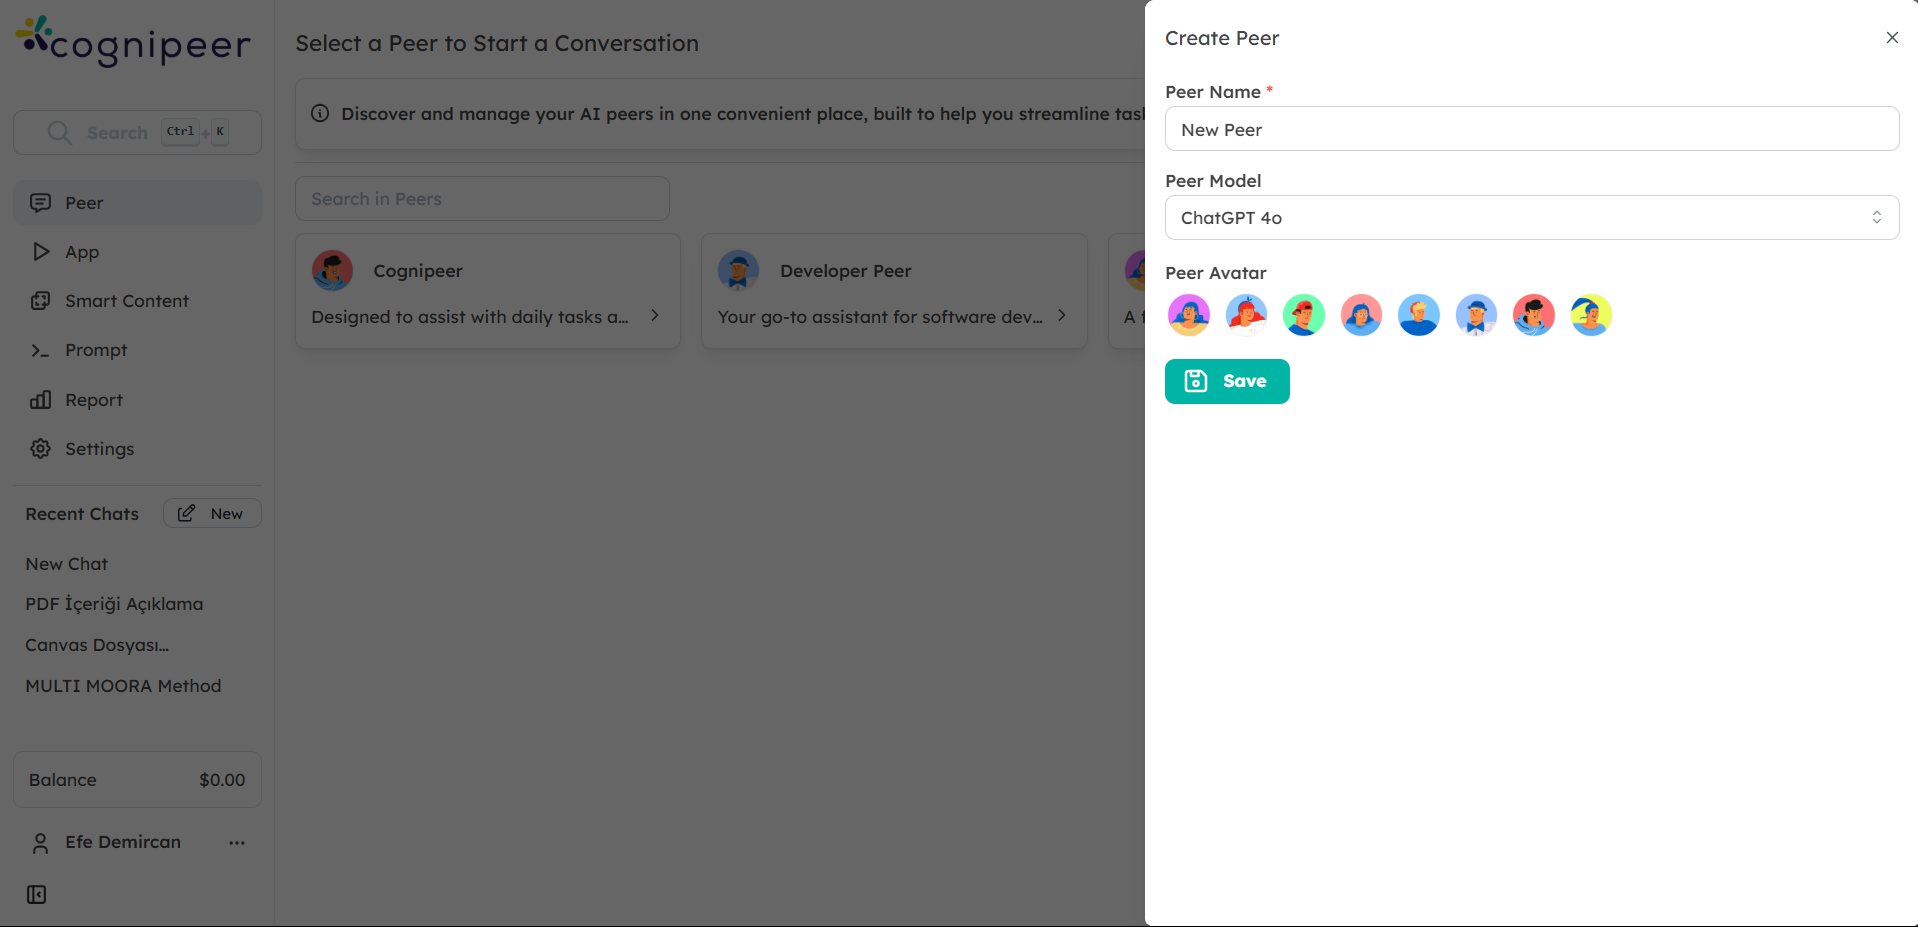
Create and Manage Peers
In the Peers section, you can easily create new AI Peers or manage existing ones.
Create a New Peer
- Click on "Create Own Peer" or select a pre-configured Peer from the Peer Gallery.
- Name your Peer, choose the AI model, and configure its initial prompts and settings.
Edit Existing Peers
- Select a Peer from the list to access its settings.
- From here, you can adjust its configurations, add tools or data sources, and modify its instructions based on your needs.

Connecting Data Sources
To improve the responses and capabilities of your Peers, connect data sources such as files, websites, or external systems.
Navigate to the Data Sources section.
Click "Add Data Source" to connect files (e.g., PDF, Excel), web pages, or custom data types to your Peer.
These data sources ensure your Peer provides accurate and context-aware answers based on the latest information available.
Tool Integrations
Extend your Peers' abilities by integrating external tools. For example, if you want your Peer to manage Jira tickets or retrieve CRM data from HubSpot, you can configure these tools in the Tools section.
- Click "Add Tool" and follow the instructions to connect tools like Jira, HubSpot, or others.
- Once connected, your Peer will be able to interact with these systems to perform tasks such as creating issues, fetching reports, or updating records.
Monitoring Peer Performance
The Performance Monitoring section is where you can track how well your Peers are performing in real-time. This section provides valuable insights into how often your Peers are being used, the accuracy of their responses, and how quickly they are responding.
- Conversation Analytics: Review conversation logs to understand how your Peer is interacting with users and identify any areas for improvement.
- Usage Statistics: Track the number of requests and responses to evaluate the overall utility of each Peer.
- Response Accuracy: Assess how accurate your Peers' responses are and fine-tune their settings accordingly.
Now that you’ve been introduced to the Dashboard, you’re ready to start creating and managing your Peers. For more in-depth guides on specific sections, refer to the linked tutorials.